
With QLM v12, you can configure Salesforce to automatically create license keys when a Salesforce order is activated.
Note that integration with Salesforce requires the Enterprise Edition of Salesforce. Additionally, administrative permissions are required to perform the steps below.
Adding Apex Classes
- Login to Salesforce
- Go to the Setup
- In the Quick Find field, type: Apex Classes, and then select "Apex Classes"
- Click "New"
- If you expect your invoice to have billing contact information, paste the content of the attached file "ApexClass_QlmOrderController_BillingContact.txt"
- If you expect your invoice to have regular contact information, paste the content of the attached file "ApexClass_QlmOrderController_CusomerContact.txt"
- Click Save
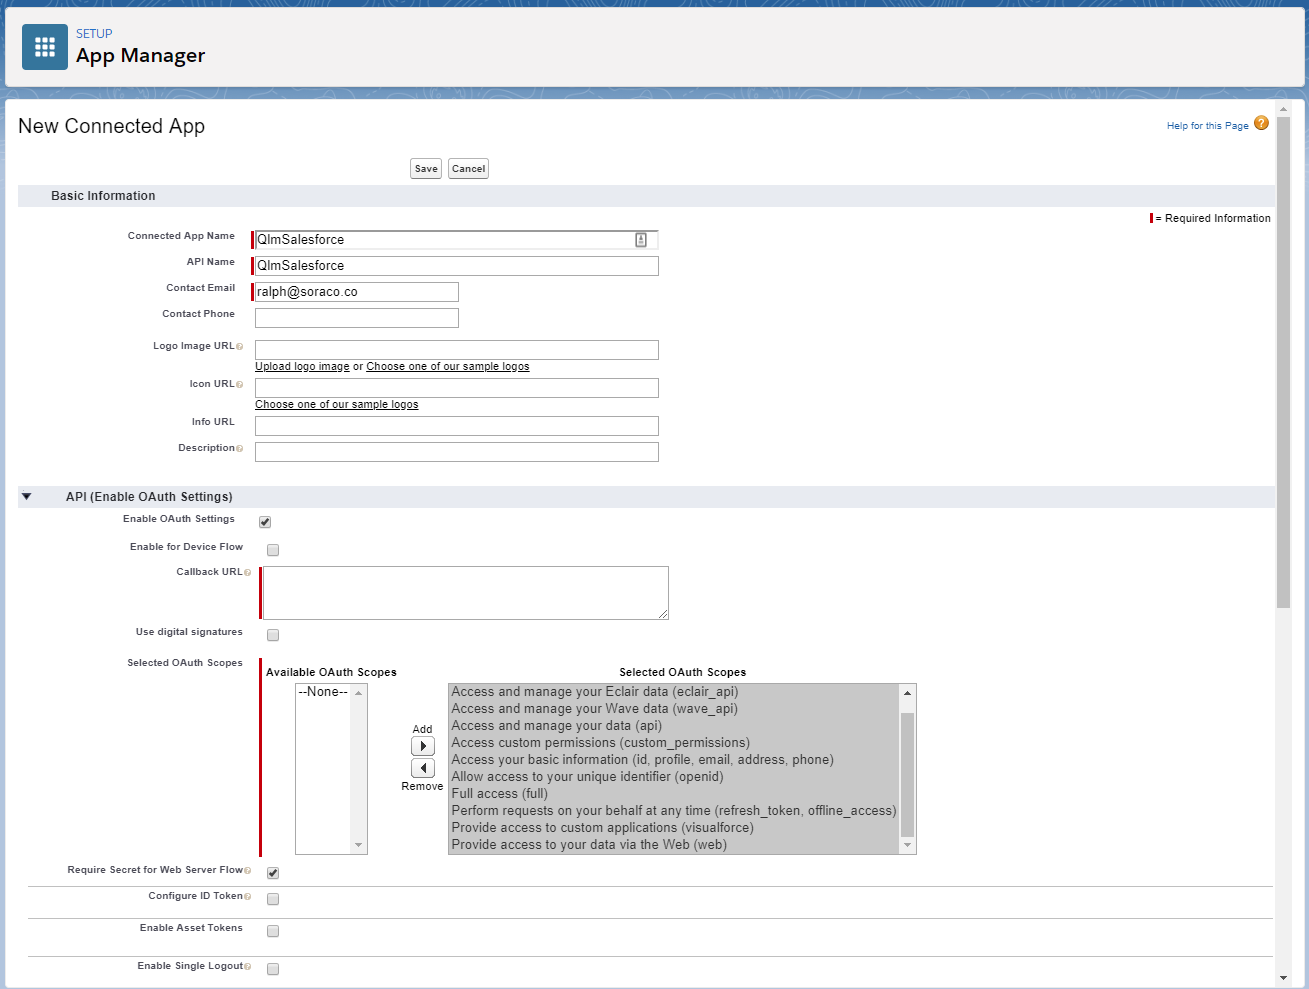
Creating a Connected App
- Login to Salesforce
- Go to the Setup
- Under Platform Tools, expand Apps / App Manager
- Click "New Connected App"
- Set the Connected App Name field as needed
- Enable OAuth Settings as shown in the screenshot below
- Set the callback URL to: https://login.salesforce.com/services/oauth2/callback
- Click Save
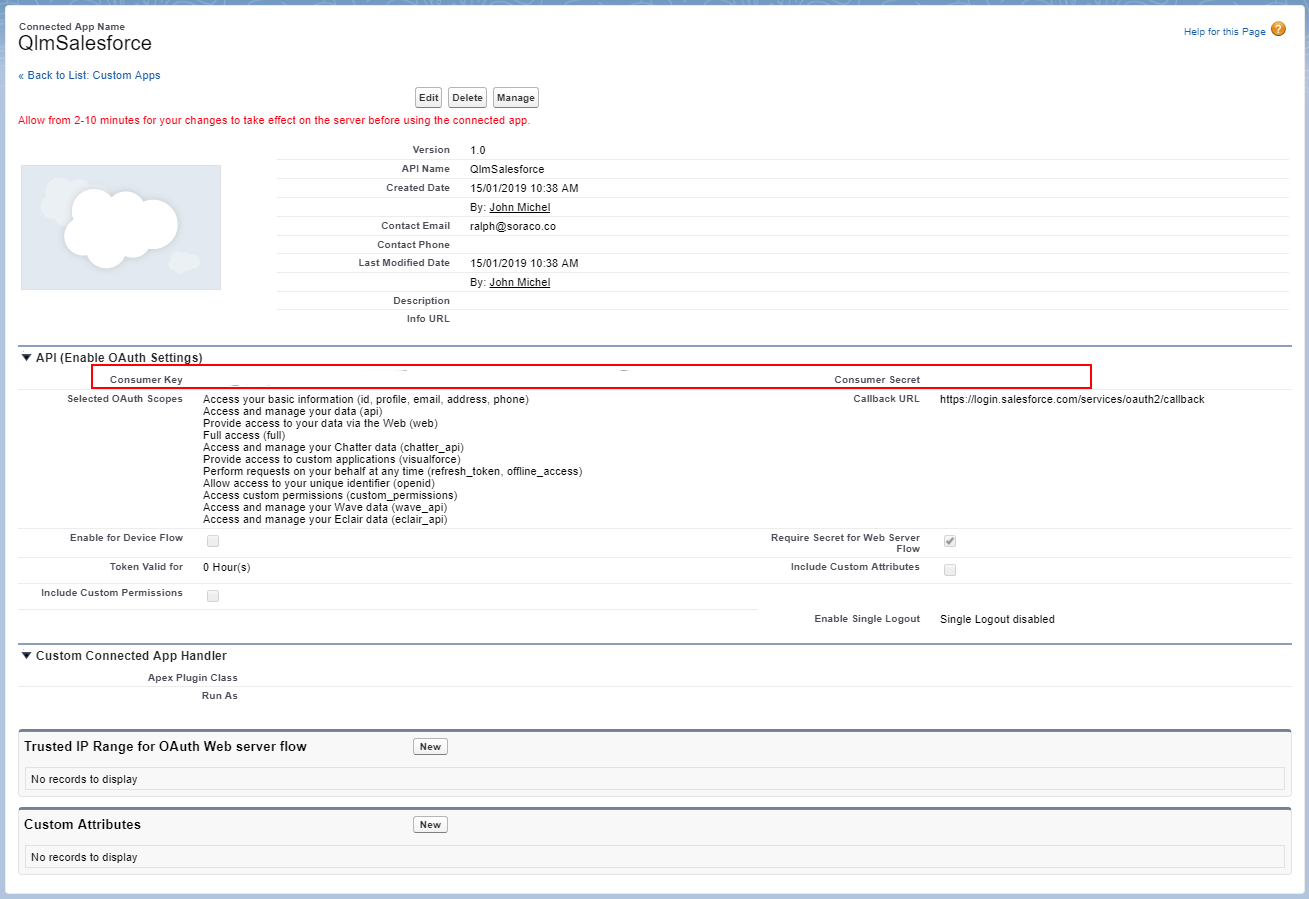
- The Connected App will then display the Consumer Key and Consumer Secret. Copy these values and store them in a safe place.
Configure QLM to connect to Salesforce
- Launch the QLM Management Console
- Go to the Manage Keys tab
- Click 3rd Party Extensions
- Select Salesforce
- Check the "Enabled" field
- In the User /Password fields, enter the credentials of a Salesforce user
- In the URL field, enter the URL to Salesforce. Example: https://soraco-developer-edition.na50.force.com
- In the API Key field, enter the Consumer Key value that you got from the previous step
- In the Shared Key field, enter the Consumer Secret value that you got from the previous step
- Click Ok
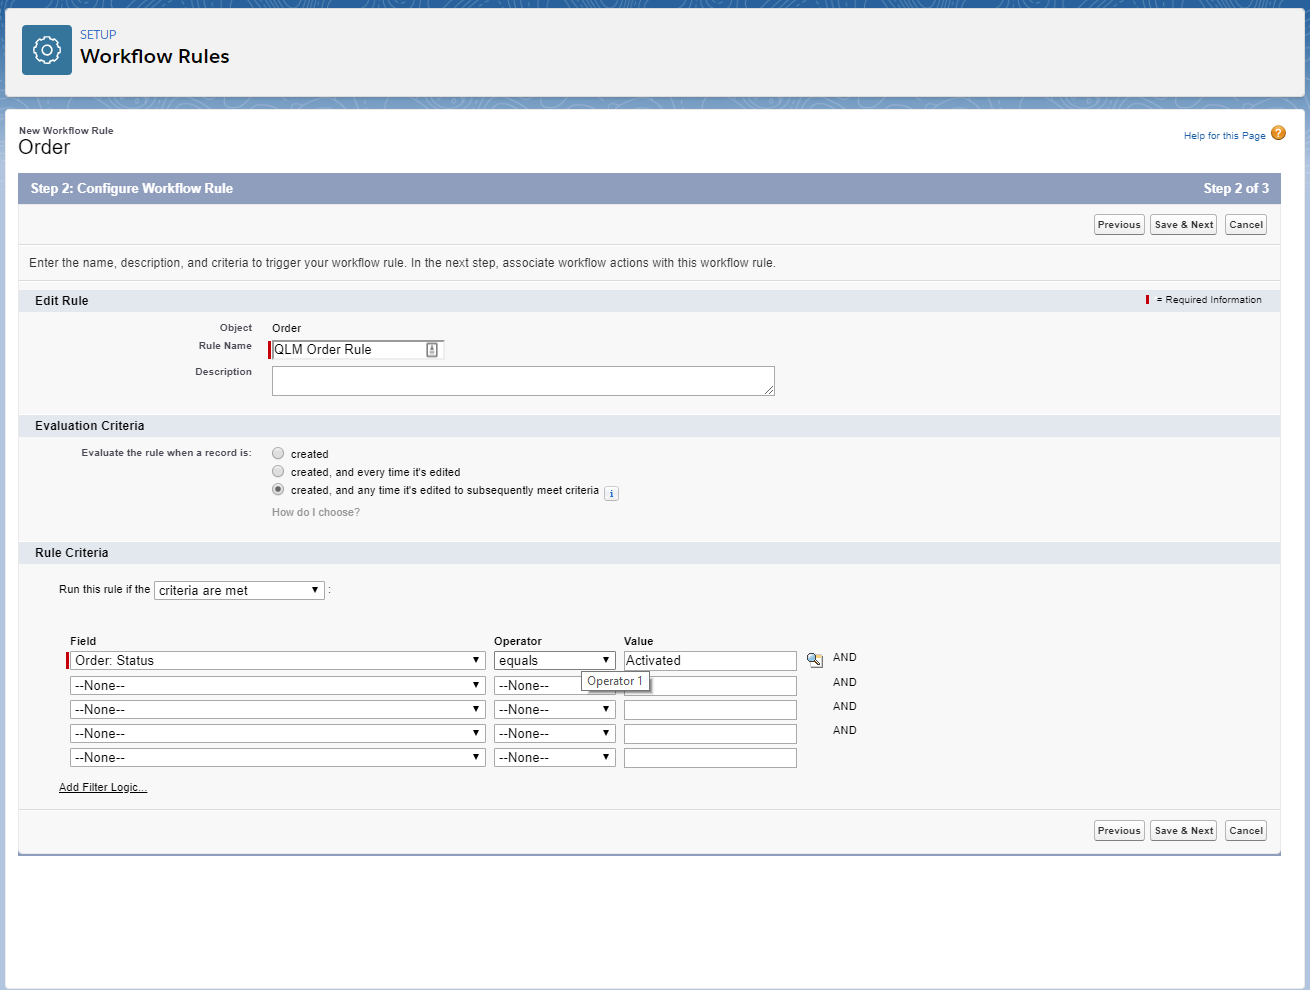
Create a Salesforce Outbound message
- Login to Salesforce
- Go to the Setup
- In the Quick Find field, type: workflow rules
- Select Workflow Rules
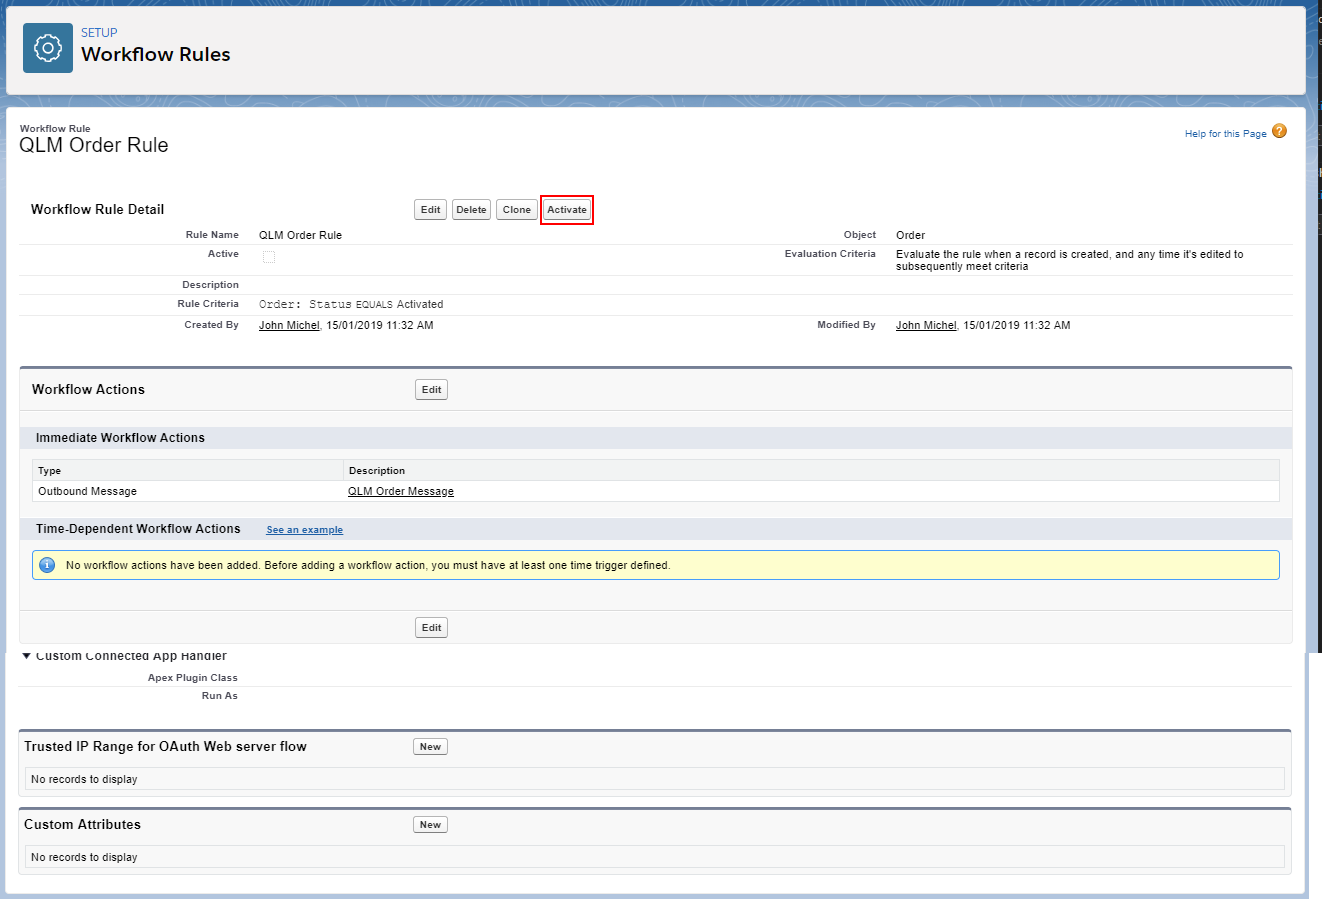
- Click "New Rule"
- Set the Object dropdown to "Order" then click Next
- Set the Rule Name to "QLM Order Rule"
- Set the Evaluation Criteria to "created, and any time it's edited..."
- Set Rule Criteria to: Order Status equals Activated
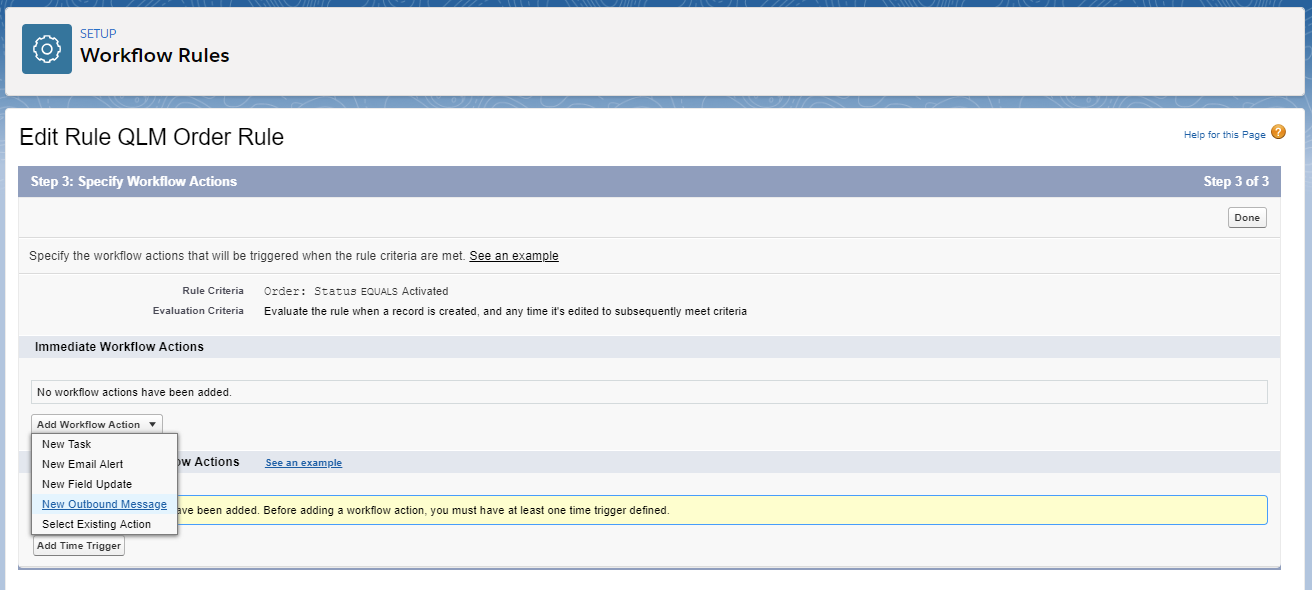
- Click Save & Next
- Click Add Workflow Action / New Outbound message
- Set the Endpoint URL to (update the URL to point to your QLM License Server): https://qlm3.net/qlmdemo/qlmLicenseServer/qlmservice.asmx/QlmWebHookHandler?is_vendor=salesforce&is_user=john@soraco.co&is_pwd=xxx&is_affiliateid=salesforce
- Add ID, OrderNumber and Status to the Selected Fields list
- Click Save
- Click Done
- Click Activate to activate the new rule
Mapping a Salesforce Product to a QLM Product
To map your Salesforce product to a QLM product, you must create a server property as follows:
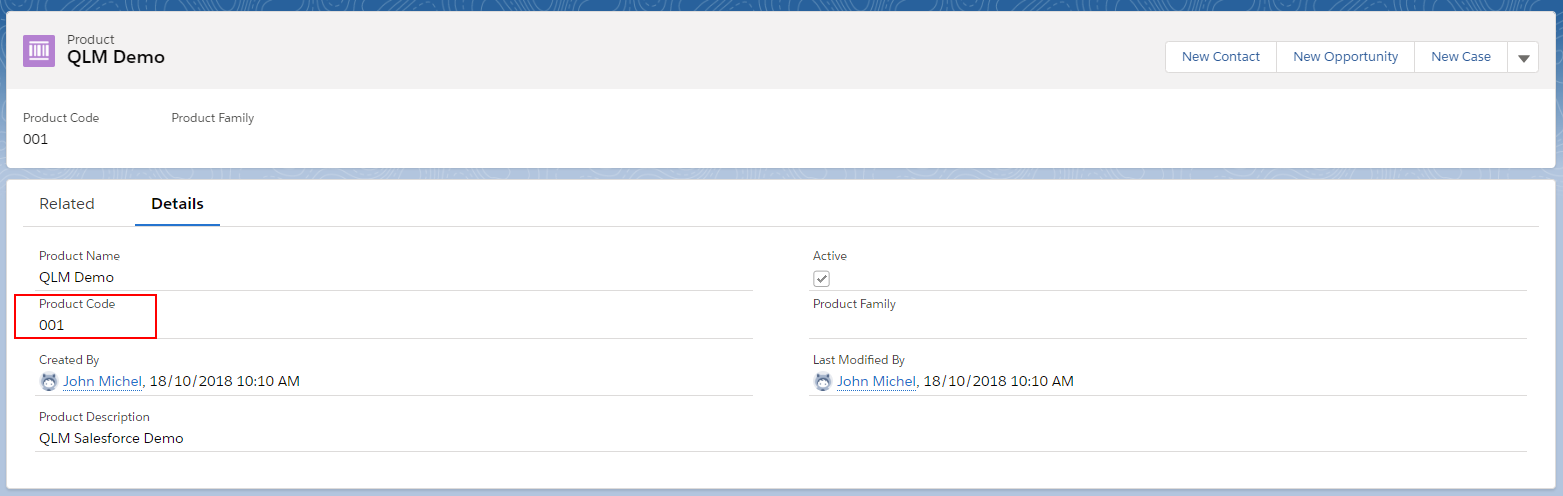
- In Salesforce, locate the "Product Code" of the product that you want to map to a QLM Product
- Launch the QLM Management Console
- Go to the Manage Keys tab
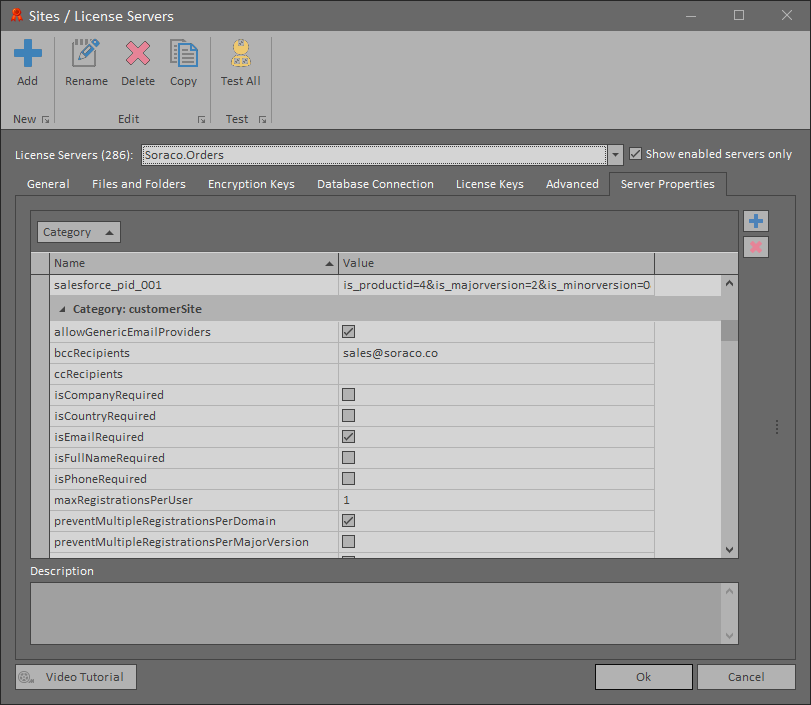
- Click Sites then select your site
- Go to the Server Properties tab
- Click the + sign on the right-hand side to add a new custom server property
- Set the property name to: salesforce_pid_<SalesForce Product Code>. For example, if your Salesforce Product Code is 001, set the name to: salesforce_pid_001
- Set the value of the property to (modify the values to correspond to your own product): &is_productid=1&is_majorversion=1&is_minorversion=0&is_productname=MyProduct&is_emailtemplate=1. New Order
- For more information about the supported arguments, refer to this article.
- Click Ok
Placing a test order
- In Salesforce, click the App Launcher and type "orders"
- Select Orders
- Click New
- Set all the required fields
- Set the "Customer Authorized by" field
- Set the Status to Draft
- Click Save
- Next, in the Order Products panel, click Add Products
- Select a product that is mapped to QLM by clicking the + button
- Click Next
- Set the Quantity then click Save
- Finally, click "Activated" then "Set Current Status"
- A new license key should have been created in QLM

Comments
0 comments
Please sign in to leave a comment.