
The steps below show how to configure QLM to send an email with a monthly analytics report.
Create a custom search that returns monthly analytics data
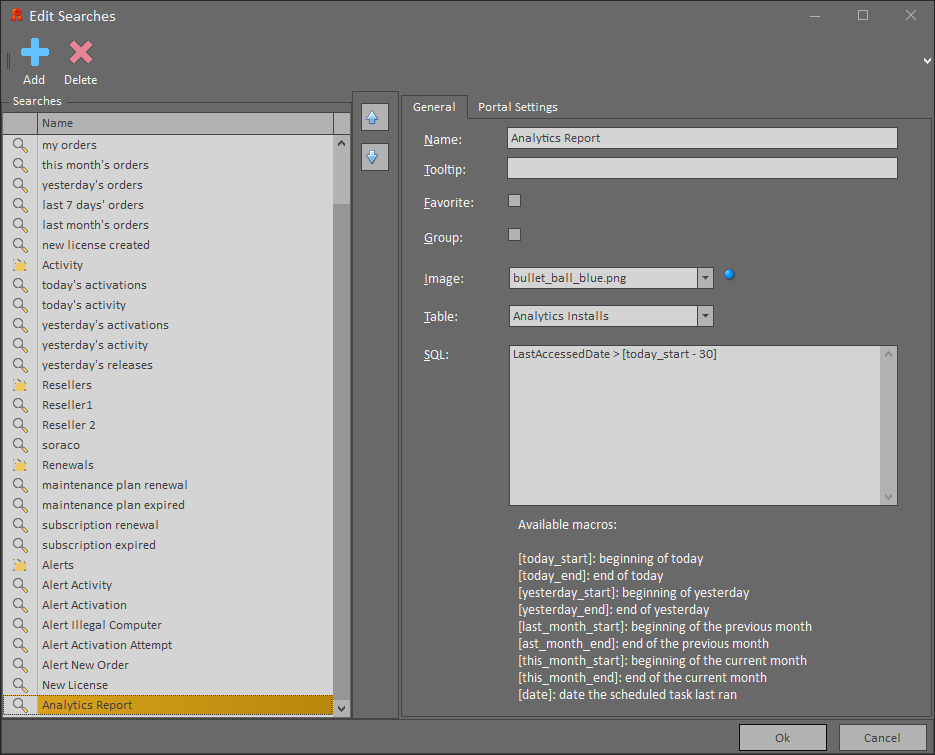
- Launch the QLM Management Console
- Go to the Manage Keys tab
- Click the "search" dropdown and select "edit searches"
- Click Add to add a new search
- Enter a name such as: Analytics Report
- Uncheck Favorite
- Set the Table to: "Analytics Installs"
- Set the SQL to: LastAccessedDate > [today_start - 30]
- Click Ok
Create an email template
- Launch the QLM Management Console
- Go to the Manage Keys tab
- Click Templates
- Click New to create a new template and set the name to "Analytics Report"
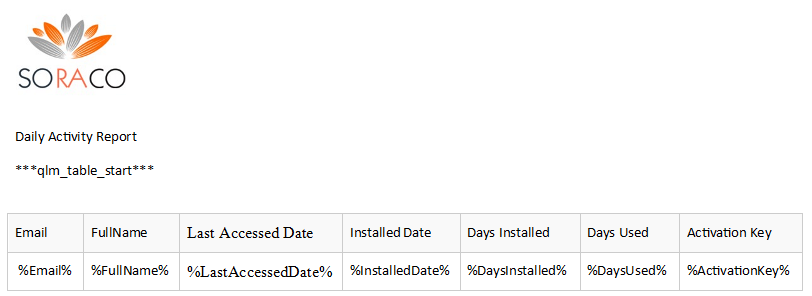
- In the email template, enter the special tag: ***qlm_table_start***
- Create a table such as the one below, then click Save. Note that you can select any field available in the qryAnalyticsInstallsView. The fields are included at the end of this article.
Create a scheduled task
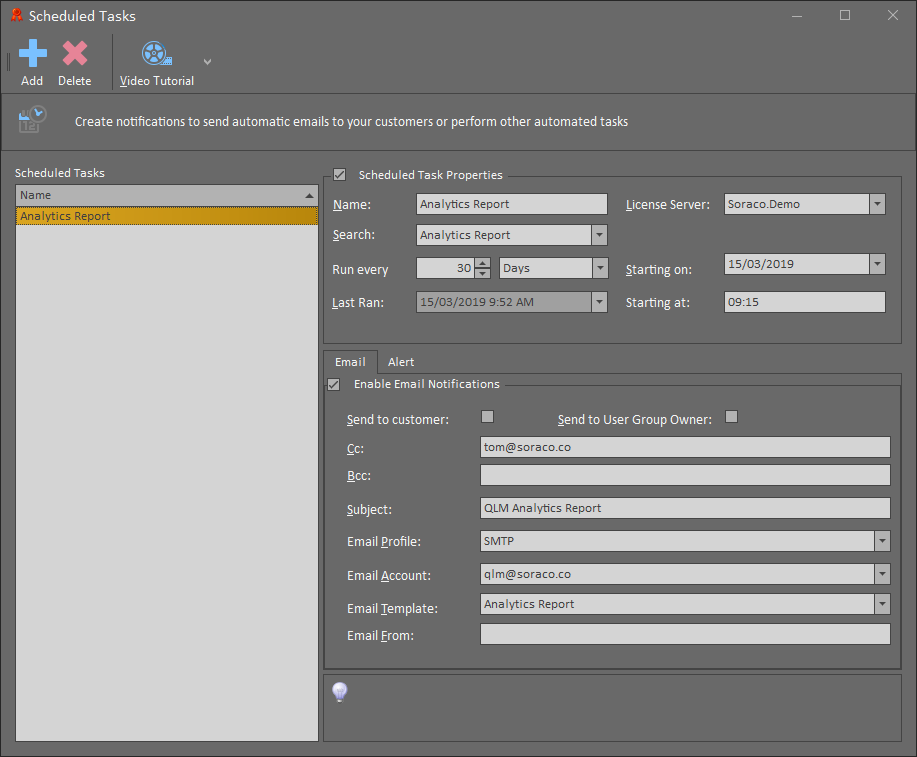
- Launch the QLM Management Console
- Go to the Manage Keys tab
- Click Scheduled tasks
- Click Add to add a new scheduled task
- Set the name of the task
- Set the License Server
- Set the Search dropdown to the search created in step 1 of this article
- Set the frequency to run every 30 days
- Click Enable Email Notifications
- Uncheck "Send to customer" and "Send to use group owner"
- In the cc field, enter the email address of the recipient
- Enter a subject
- Select an email profile
- Select an email account
- Set the Email Template to the Email Template created above
- Close the Scheduled Tasks editor
Fields available in the Analytics email template
ActivationDate
ActivationKey
Company
ComputerID
ComputerKey
ComputerName
ComputerType
Country
CustomData1
CustomData2
CustomData3
DaysInstalled
DaysUsed
DaysUsedUpdated
Disabled
Email
Features
FullName
IdleDays
IncludeInMailList
InstalledDate
InstallID
IPAddress
LastAccessedDate
LicenseModel
MaintenanceRenewalDate
OrderDate
OS
ProductID
ProductMajorVersion
ProductMinorVersion
ProductName
SoftwareVersion
SubscriptionExpiryDate
Trial
UninstallDate
Comments
0 comments
Please sign in to leave a comment.